Install the MPLAB IDE software before installing the KIT2 driver
one. Install the KIT2 driverWhen the KIT2's USB is connected to the computer, the computer prompts: Discover new hardware. Select to automatically install the driver, the computer will automatically search for the corresponding driver until the driver installation is complete.
two. Connect KIT2 ProgrammerKit2 is connected to the target board (you can temporarily not connect to the target board)
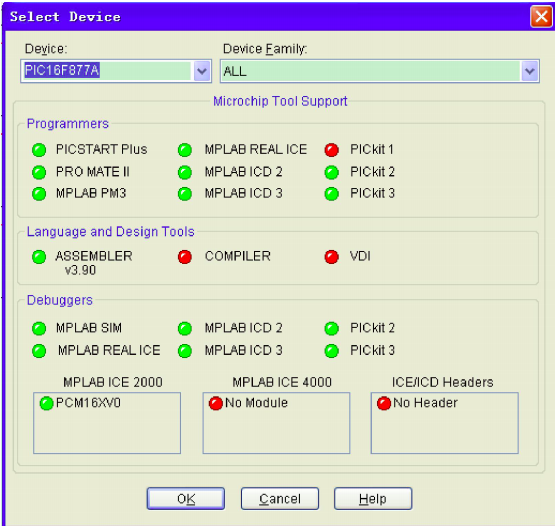
1. Select the target chip: Configuer--"Select Device()--"OK! !
2. Connect KIT2: Programmer--"Select Programmer--"Pickit 2
3. Download the operating system: Programmer--DownloadOS Select to open, after about 10 seconds, the operating system is downloaded.
In the case of a target board, normal conditions will appear
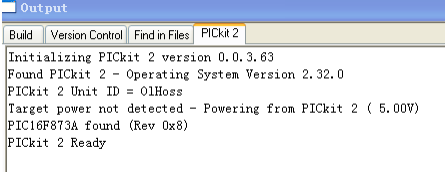
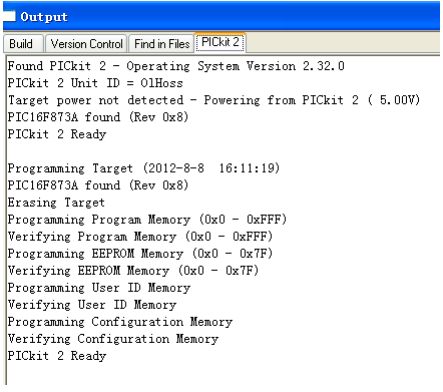
Appears when no target board is connected

Connect to the target board and click on the program-"Connect" to display the normal prompt.
Note: The programming is done by disconnecting the kit2 sequence: programmer select programmer none ; then unplug the pickit2 from the data line
three. Power supply equipmentKIT2 can supply power to the target board, but please note that the voltage of KIT2 is obtained by the computer USB power supply. Since the USB output voltage of the computer is not high and the current is not large enough, if there is a device with high current on the target board, please select An external independent power supply supplies power to the target board, otherwise the KIT2 will not be properly connected to the computer. The low current target board can be directly powered by the KIT2.
Steps:
Menu Programmer--"Settings
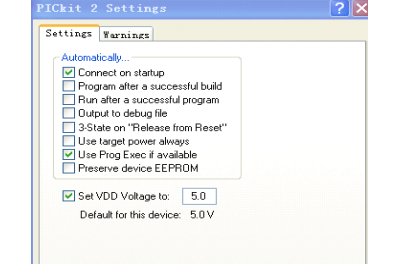
Check these two --" OK!
At this point, kit2 can be online! !
If the above prompt appears on the connection--" please pull out the USB cable (wait for the "beep" 1 occurrence)--" and then if the USB cable is not plugged in, press the software in the program (Programmer--" Connect)--"Re-insert the USB cable (waiting for the "beep" 1 occurrence) --" Online (programmer--"connect)--"OK!
The correct operation is:
This option can be avoided by selecting the programmer or debugger as None before unplugging the USB cable. Specific: (Programmer--"Select Programmer--"None) or (debugger--"Select tool--"None)
Four: use kit2 to perform the burning operation steps as follows1, select the chip: Configuer--"Select Device
2, online: Programmer--"Select Programmer--"pickit 2
3. Import Hex to burn files: File--"Import (select to burn files)
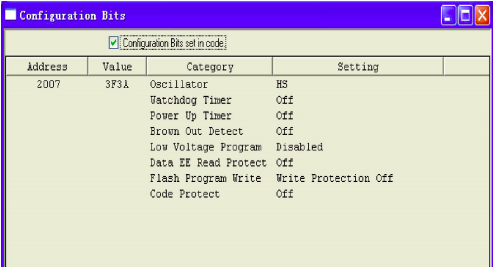
4, set the configuration word: Configuer--"Configuration bit

5, start programming Programmer--"Program appears under normal circumstances
1, select the chip: Configuer--"Select Device
2, online: Debugger--"Select Tools--" pickit 2
3, set the configuration word: Configuer--"Configuration bit (as in the previous settings)
4, open the project file: Project--"Open
5, compile: source program compiled
6, Debugger--"Program (Note: every compilation must be downloaded) can be set to automatically compile every compilation
At this point, you can run the program, or step through and so on.
Our company offers rubber, and specialty seal and o-ring for molding electronic and electrical Connectors, both circular and rectangular types. We have in house capabilities and quick turn around.
Cable Grommets with various Grommet Shapes, Rib Styles, Slot Shapes, Inner Flanges, and Colors - To have access to our 3D Cable Grommet Design Tool
Silicone Rubber Products,Cable Silicone O-Ring,Rubber Seal,Custom Silicone Seal,Waterproofing O-Ring,Tpe Grommet
ETOP WIREHARNESS LIMITED , https://www.wireharnessetop.com